Kitchen Drawer Divider Installation Tips
Kitchen drawer dividers can change your kitchen organization. They create order and save time.
Installing kitchen drawer dividers may seem tricky, but it’s simple with the right tips. Whether you’re tired of cluttered drawers or just want a neater space, the right dividers can make a big difference. The process doesn’t have to be hard or expensive.
With a few tools and some guidance, you can transform your kitchen drawers. This guide will help you install drawer dividers easily and quickly. You’ll find that a well-organized kitchen is within reach. Ready to get started? Let’s dive into these practical installation tips!
Choosing The Right Divider
Installing kitchen drawer dividers helps organize utensils and maximize space. Measure drawer dimensions accurately before buying dividers. Select adjustable dividers for flexibility.
Selecting the perfect kitchen drawer divider can transform your kitchen space. The right divider keeps everything organized and easy to find. A good divider also maximizes the use of your drawer space. But how do you choose the right one? Consider the material, size, and fit.
Material Options
The material of the divider plays a crucial role. Wooden dividers add a touch of elegance and are durable. Plastic dividers are budget-friendly and easy to clean. Metal dividers offer a modern look and are very sturdy.
Size And Fit
The size and fit of the divider are equally important. Measure your drawer before buying a divider. Ensure the divider fits snugly inside the drawer. It should not move around when you open and close the drawer. Adjustable dividers can be a great option for custom fits.
Gathering Necessary Tools
Installing kitchen drawer dividers can greatly improve your kitchen’s organization. To ensure a smooth installation, gather the necessary tools first. This guide will help you identify both basic and specialized tools required for the task.
Basic Tools
Basic tools are essential for almost any DIY project. For installing kitchen drawer dividers, you will need the following:
- Measuring Tape: Accurate measurements are key. Measure the drawer’s width, length, and height.
- Pencil: Mark the spots where the dividers will go.
- Screwdriver: A standard flat-head or Phillips screwdriver will work.
- Level: Ensure your dividers are straight and even.
- Hammer: Secure any nails or small pins if needed.
Specialized Tools
Some projects require more than just the basics. For a more professional finish, consider these specialized tools:
- Electric Drill: Make precise holes quickly and easily.
- Jigsaw: Cut dividers to the right size if they need trimming.
- Clamps: Hold pieces in place while you work.
- Wood Glue: Ensure a strong bond between dividers and drawer.
- Square: Keep all angles perfect and straight.
Having the right tools makes the job easier and more efficient. This list will help you get started with your kitchen drawer divider installation.

Measuring Your Drawers
Accurate measurements are crucial for a successful kitchen drawer divider installation. Precise dimensions ensure that the dividers fit snugly and function well. Let’s break down the process into simple steps.
Length And Width
First, measure the length of your drawer from the front to the back. Use a tape measure for accuracy. Record this measurement. Next, measure the width from one side to the other. Note this dimension as well. These measurements will help you determine the size of the dividers.
Depth Considerations
Depth is another important factor. Measure the inside depth from the bottom to the top edge. Make sure to account for any drawer hardware. This ensures the dividers fit without obstructing the drawer’s function. Write down these measurements for reference.
By taking accurate length, width, and depth measurements, you’ll be ready to choose the perfect drawer dividers. Happy organizing!
Preparing The Drawers
Properly preparing your drawers can make kitchen drawer divider installation smooth and efficient. Start with a clean slate to ensure the new dividers fit well. Follow these steps to get your drawers ready.
Cleaning The Space
Empty the drawer completely. Remove all items, including any small debris or crumbs. Use a damp cloth to wipe down the interior. Ensure you clean all corners and edges thoroughly. Let it dry completely before proceeding.
Removing Existing Dividers
If your drawer has old dividers, take them out. Use a screwdriver for any screws or brackets. Carefully lift the dividers to avoid damaging the drawer. Dispose of or store the old dividers if still usable.
Cutting The Dividers
Cutting the dividers for your kitchen drawers is an important step. Ensuring a perfect fit will help keep your drawers organized. This process involves measuring, marking, and cutting the divider materials. Let’s dive into some essential tips for cutting the dividers accurately and safely.
Safety Tips
Safety is paramount while cutting materials. First, always wear safety goggles. Protect your eyes from flying debris. Second, use gloves to prevent cuts on your hands. Third, ensure your workspace is clean and well-lit. A clutter-free area reduces accidents. Lastly, keep a first aid kit nearby. It’s better to be prepared for small incidents.
Cutting Techniques
Different tools can be used for cutting dividers. A handsaw is a good choice for wooden dividers. Measure the length you need and mark it clearly. Cut along the marked line with steady movements. For plastic or metal dividers, a hacksaw works well. Use the same measuring and marking process. Cut slowly to avoid breaking the material.
For those with a power saw, ensure you know how to use it. Follow the tool’s instructions carefully. Keep your hands away from the blade. Use clamps to hold the material steady. A steady material ensures a straight cut.

Installing The Dividers
Installing kitchen drawer dividers can transform your kitchen organization. Proper installation is key to maximizing their benefits. Let’s dive into some practical tips for a smooth installation process.
Placement Strategies
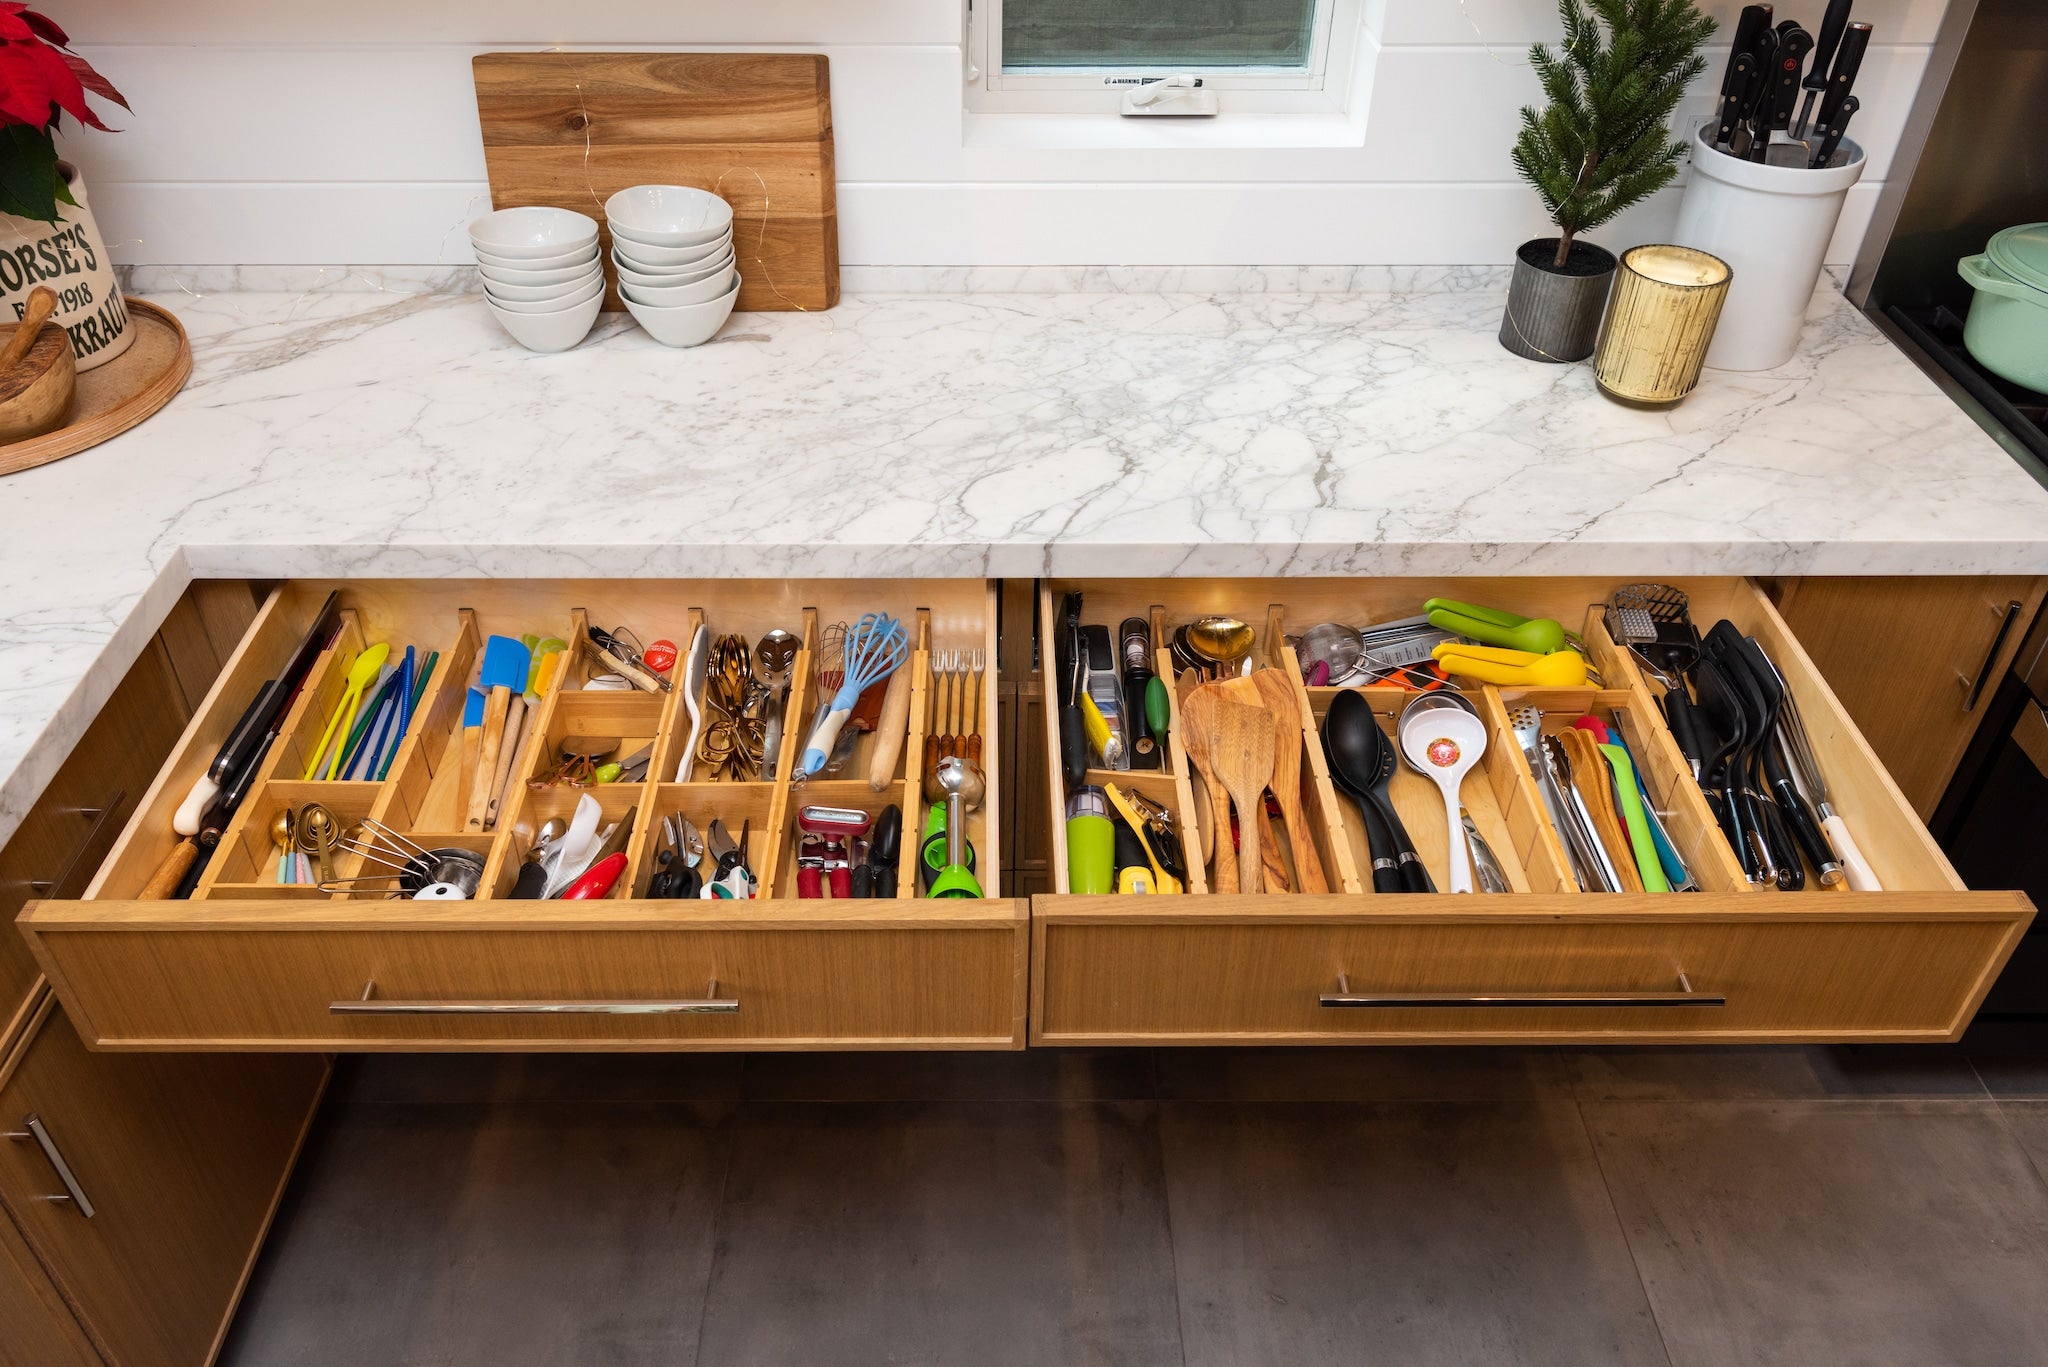
Start by emptying your drawer completely. This gives you a clear view of the space. Arrange items to see how they best fit. Group similar items together. This helps in deciding the divider’s placement. Measure the drawer’s interior dimensions. Use these measurements to choose the right-sized dividers. Consider adjustable dividers for flexibility. They allow you to change the setup as needed.
Securing The Dividers
Once you have the layout, it’s time to secure the dividers. Some dividers come with adhesive strips. Peel the backing and press firmly into place. For wooden dividers, use small screws or nails. Align them properly before securing. Make sure they are tight and not wobbly. Double-check the stability by placing items back in the drawer. Adjust if necessary for a perfect fit.
Organizing Your Items
Organizing your kitchen drawer items can be a daunting task. A well-organized drawer saves time and reduces stress. With the right strategies, you can keep your kitchen neat and tidy. Here are some helpful tips for organizing your items using kitchen drawer dividers.
Categorizing Items
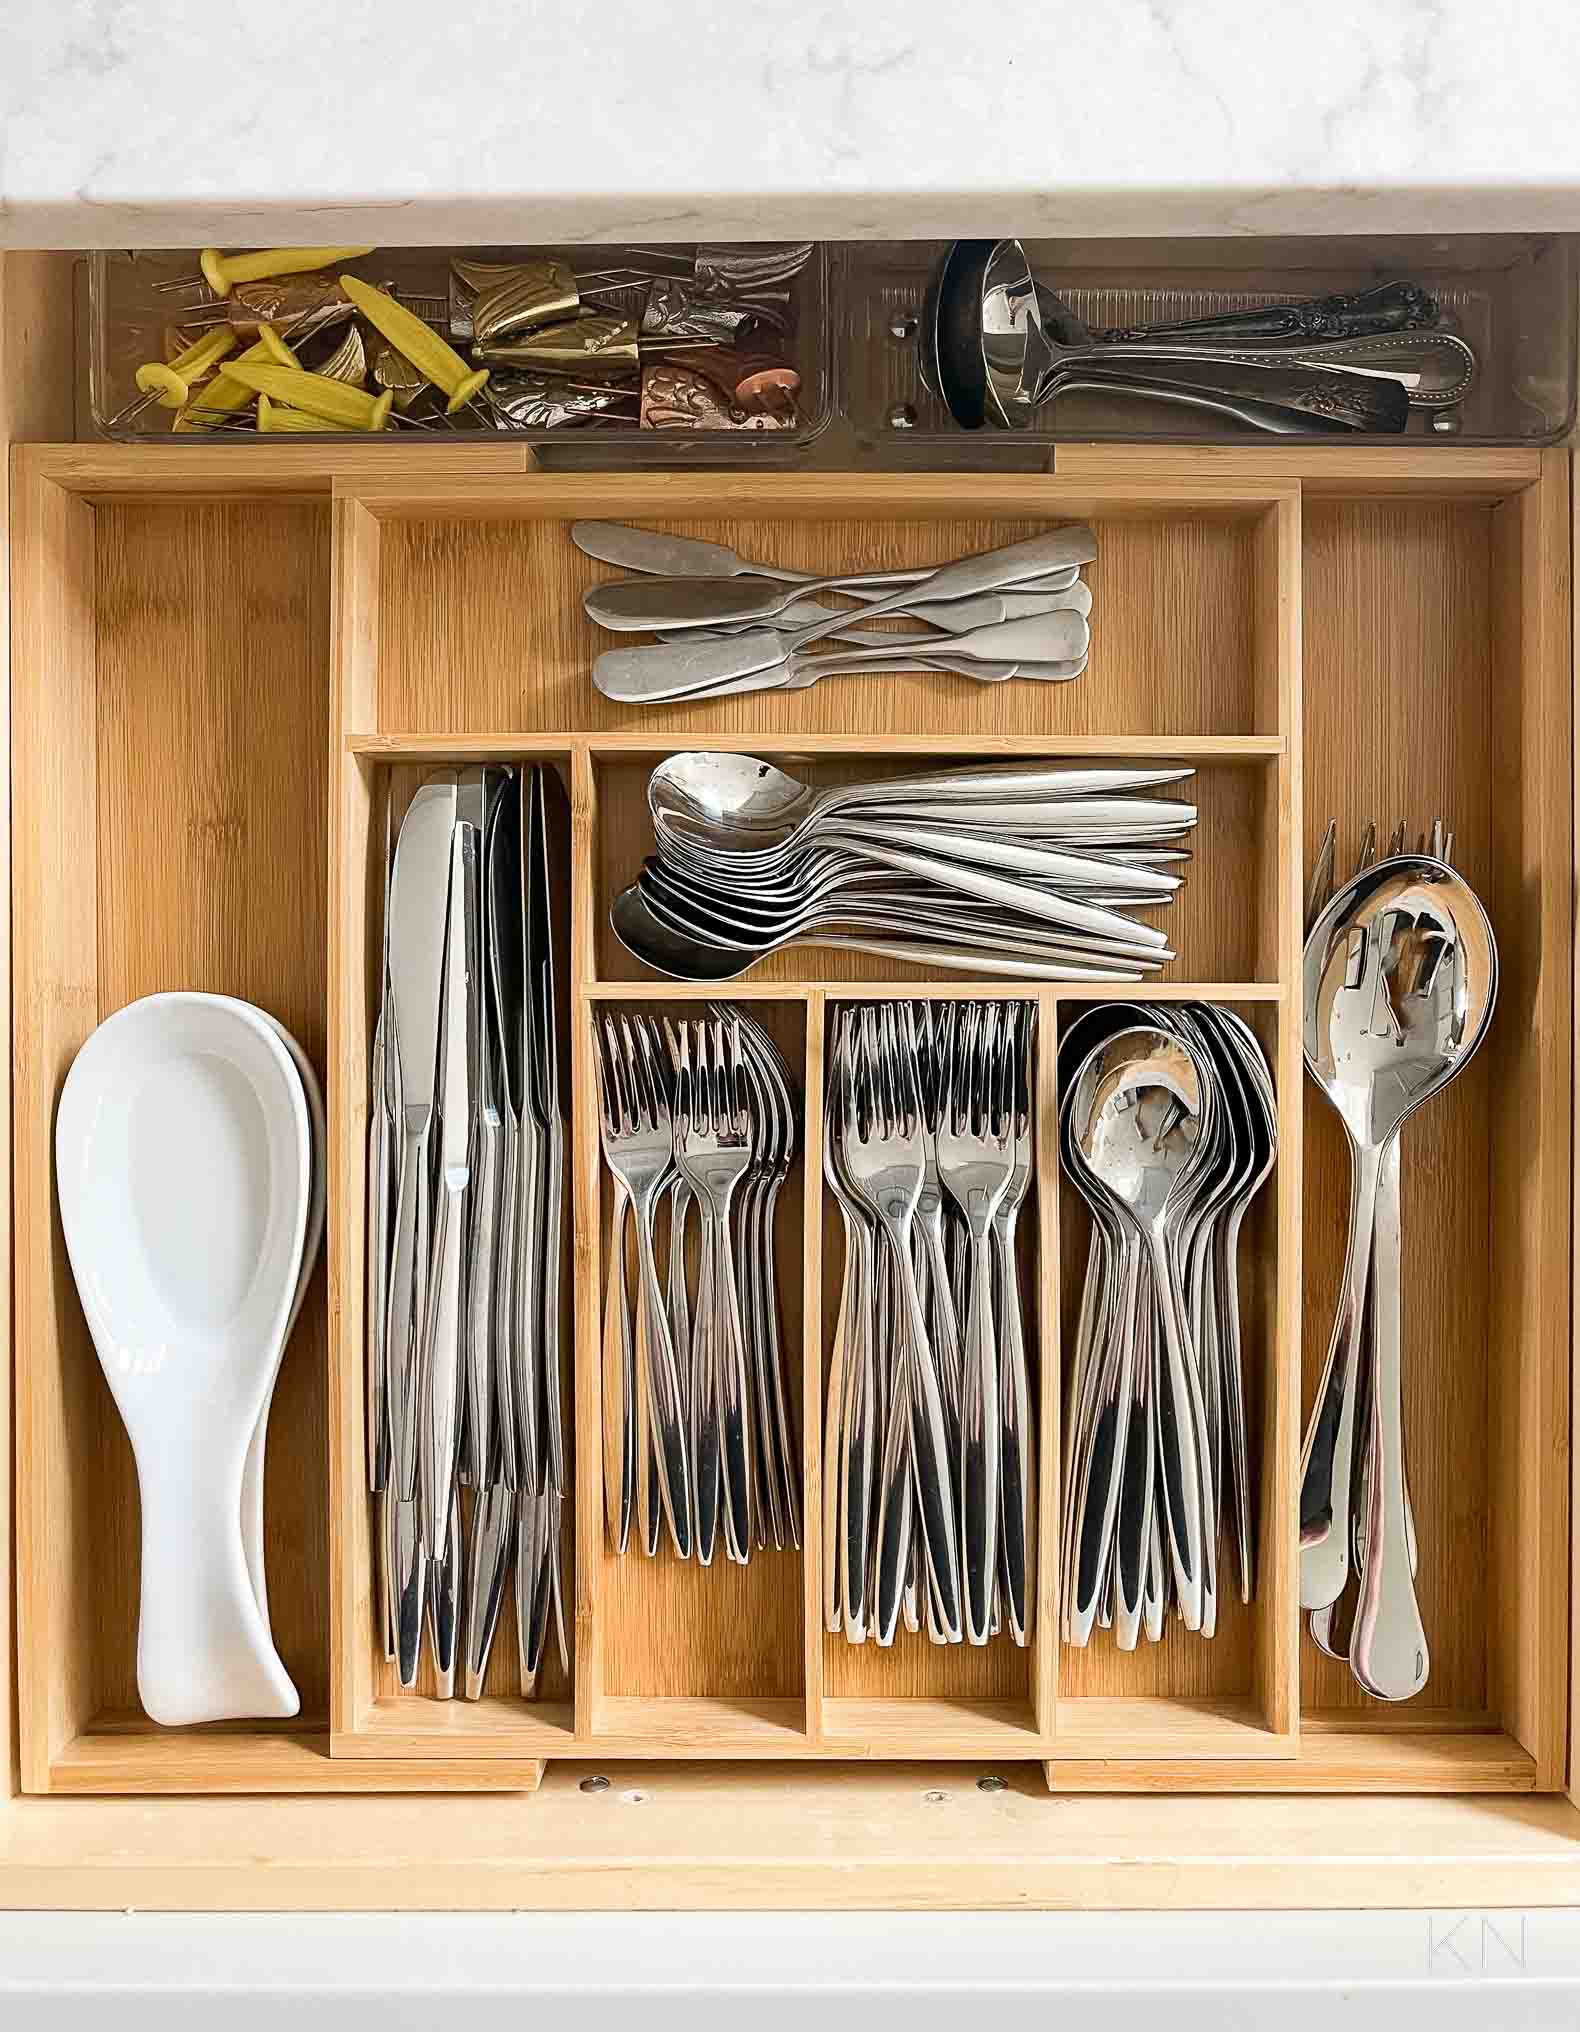
Start by categorizing your kitchen items. Group similar items together. This makes it easier to find what you need quickly.
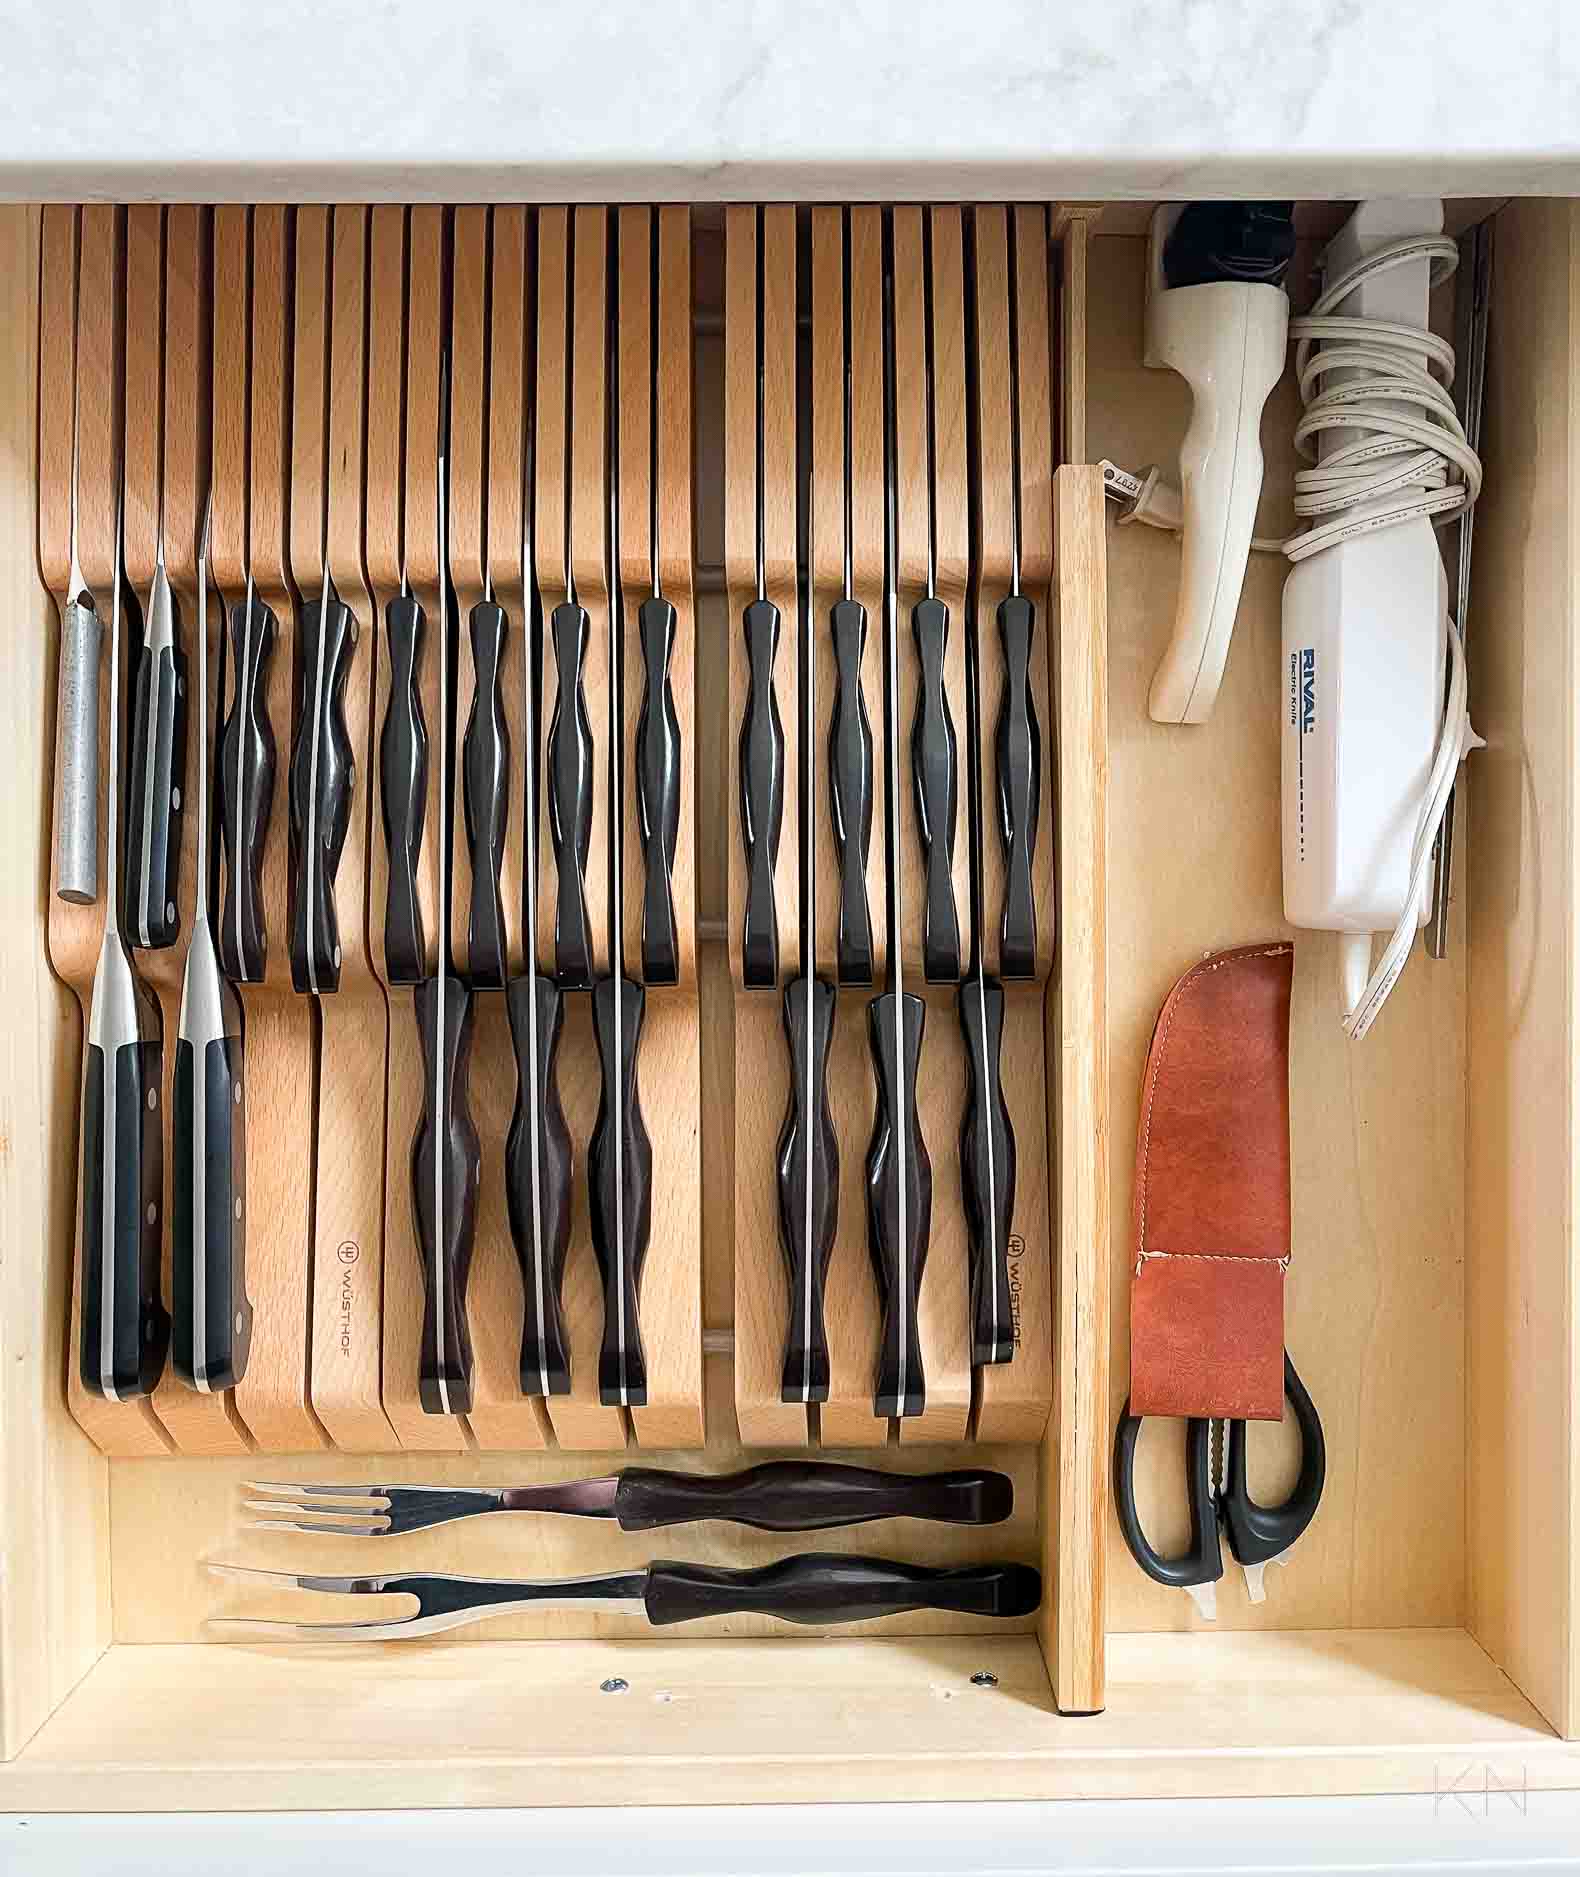
- Utensils: Place forks, spoons, and knives in separate sections.
- Cooking Tools: Group spatulas, whisks, and tongs together.
- Gadgets: Keep peelers, can openers, and graters in one area.
Maximizing Space
Maximizing drawer space is crucial for a well-organized kitchen. Use these tips to make the most of your space:
- Adjustable Dividers: Use adjustable dividers to fit different items.
- Stacking Trays: Add stacking trays for smaller items like measuring spoons.
- Custom Inserts: Consider custom inserts for a tailored fit.
| Category | Items |
|---|---|
| Utensils | Forks, Spoons, Knives |
| Cooking Tools | Spatulas, Whisks, Tongs |
| Gadgets | Peelers, Can Openers, Graters |
Remember to keep your kitchen drawer tidy. An organized drawer enhances your cooking experience.
Maintaining The Dividers
Proper maintenance of your kitchen drawer dividers is essential. It ensures they stay clean, organized, and functional. Regular care can extend their lifespan. Here are some tips for maintaining your kitchen drawer dividers.
Regular Cleaning
Keep your drawer dividers clean to avoid dust and grime buildup. Use a damp cloth and mild soap. Wipe down each section carefully.
- Remove all items from the drawer.
- Use a mild soap solution to clean the dividers.
- Dry them thoroughly before placing items back.
This process should be done weekly. It keeps the dividers looking fresh and new.
Inspecting For Damage
Regularly check your dividers for any signs of wear or damage. This ensures they remain functional.
- Look for cracks or breaks in the material.
- Check for loose screws or fittings.
- Replace any damaged parts immediately.
Early detection of issues can prevent bigger problems later.
Frequently Asked Questions
How To Choose The Right Drawer Divider?
Selecting the correct drawer divider depends on your drawer size and organization needs. Measure your drawer dimensions. Consider adjustable dividers for flexibility. Choose materials that match your kitchen style.
Can I Install Drawer Dividers Myself?
Yes, installing drawer dividers is a simple DIY project. Measure your drawer. Cut dividers to size. Place them in the drawer. Secure them if necessary.
What Tools Do I Need For Installation?
Basic tools needed include a tape measure, a saw for cutting dividers, and a screwdriver. Some dividers may require adhesive or screws for installation.
Are Adjustable Dividers Better Than Fixed Ones?
Adjustable dividers offer flexibility and can be reconfigured as your needs change. Fixed dividers provide stable and permanent organization. Choose based on your preference.
Conclusion
Organizing your kitchen drawers can be simple with the right dividers. Follow these tips to install them easily. Measure your drawer space, choose the right materials, and fit the dividers snugly. Keeping your kitchen tidy helps save time and reduces stress.
Happy organizing!